
Japanese Sashiko Tutorial: Wave design
When people ask me where to start with Sashiko, I often suggest Sashiko fukin (foo-keen). Also called hana-fukin (“flower cloth” 花ふきん) or yume-fukin (“dream cloth” 夢ふきん), these are double layered cloths made from a single layer of lightweight cotton fabric folded in half to make a small towel. They are absorbent and quick to dry, with the finished towel measuring approximately 12”x12”.
I’ve selected the classic design of seigaiha for this tutorial, a design suitable for beginners and yet enjoyable even if you’re an experienced stitcher. There are many variations of seigaiha – the ubiquitous Japanese wave design that consists of overlapping arches. Turn it upside down and you have fish or dragon scales. Add an extra line or two and you have rainbows. It’s pretty versatile and adaptable.
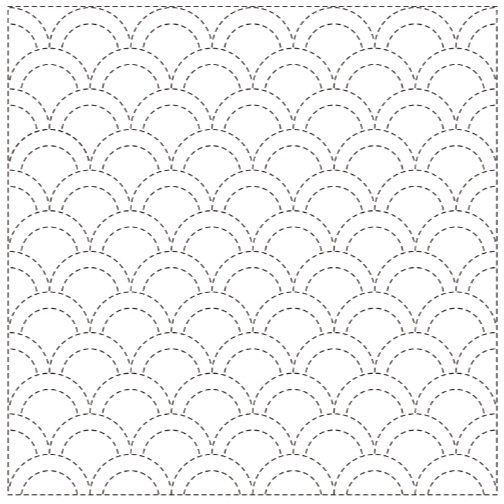
Printed pattern of seigaiha
Let’s break down the instructions that are printed on the fabric.
Please note: the use of navy or white fabric in the photos is for example purposes only; they are not the same piece.
Before we begin, a warning!
All of the markings are printed in a washout ink that will disappear with water.
Do not spray, steam, or iron the fabric until you are finished!
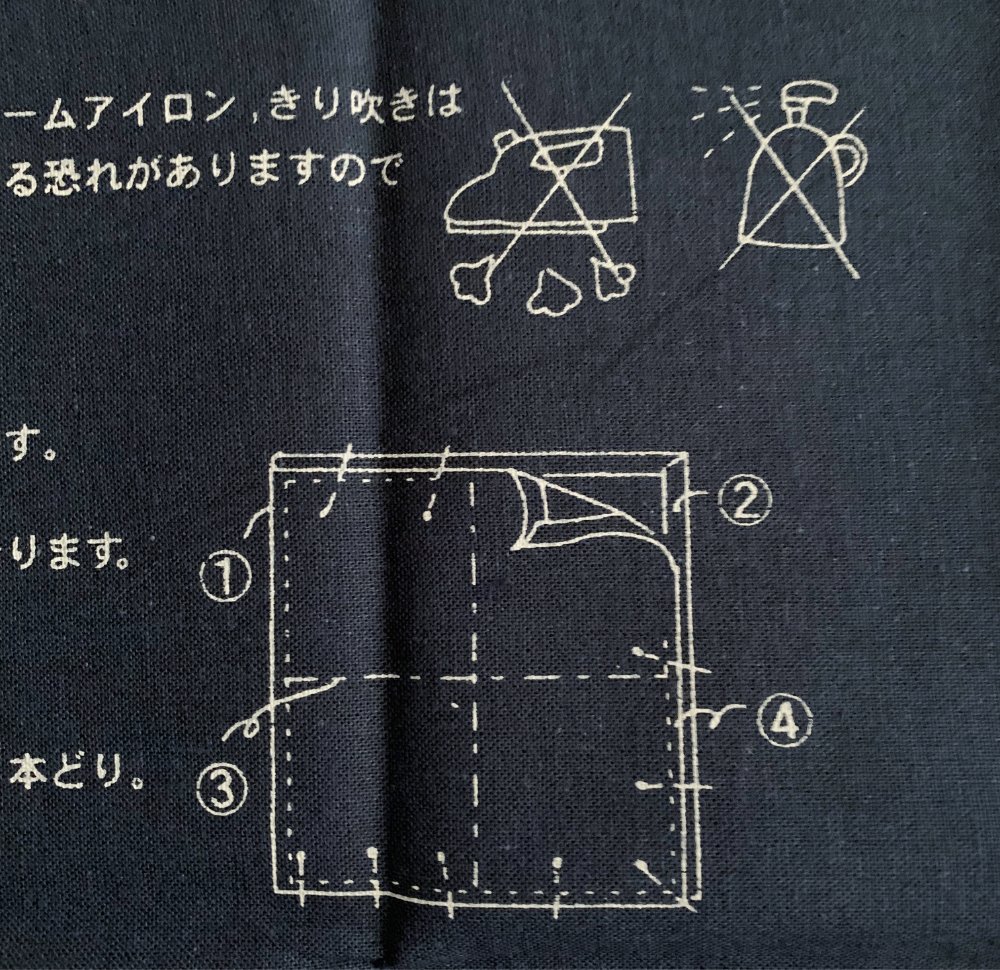
The numbers in the previous image correspond to these instructions:
Fold fabric in half with printed design (top) facing you, and trim excess fabric along edges to approximately 1/4″ from folding line
Fold edges in, pin in place
Baste to secure layers
Stitch the border on the marked dotted lines
Stitch pattern as shown
The short dotted lines printed on the fabric are your stitch lines. The long-and-short lines are folding lines.
Thread Notes: I prefer to stitch with a long thread, roughly 1 yard (36″) ~ 1 meter (39.5″) long. This length is perfect for stitching the border, as you can go all the way around on one thread. Choose a 4- or 6-ply sashiko thread. I primarily use Daruma, Yokota, and Olympus brands.
Sashiko thread is not meant to be split, but it can be doubled for a thicker look. I do not suggest doubling for this project as pulling thick thread through layers of fabric is kind of a nightmare and aggravates any existing carpal tunnel issues.
So, how to start stitching? You could tie a basic knot, but since sashiko thread is so thick, I prefer not to use knots unless necessary. See below for an example of backstitch and carry-over stitches. Backstitch is best when you have definite start-and-stop points in a design. Carry-over is great when you’re following a straight line that connects to itself, such as the outline/border, or are playing “thread chicken” (can you make it to the end of the design before running out of thread? Let’s find out!).
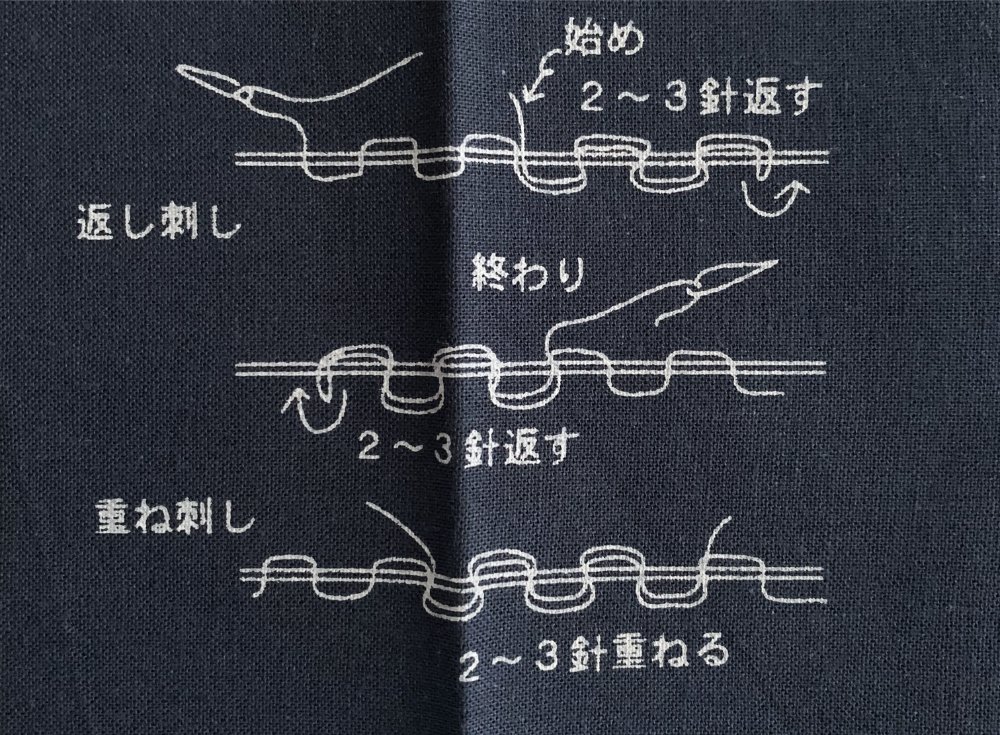
When using either technique its best to co-mingle the threads. That helps the fibers lock into each other and keep your ends secure. Allow for a 1cm or 1/4″ tail when you start and stop.

Here I have the tail showing on the back, but I often show the entry tail on the top of the fabric. This is a personal preference of mine. I like to see where my loose ends are so I can hold them down if I need to pull my thread while stitching.
All of my tails are trimmed close to the fabric when I finish and disappear between the layers when I wash the cloth.

If this is your first time trying sashiko, you’ll want to get comfortable with stacking your stitches rather than taking them one at a time. With practice you’ll find this makes for smoother progress and the back of your projects will look better, too. Smooth out the stitches as you go and keep your stitches slack, think soft thoughts. Just let yourself putter.

There are different ways to connect the waves in the back. You can see my preference for skipping alternate rows so that each skip thread in the back is the same length, rather than doing one short skip and one long skip. Both are fine, I just prefer the balanced feel of the alternate row skip.
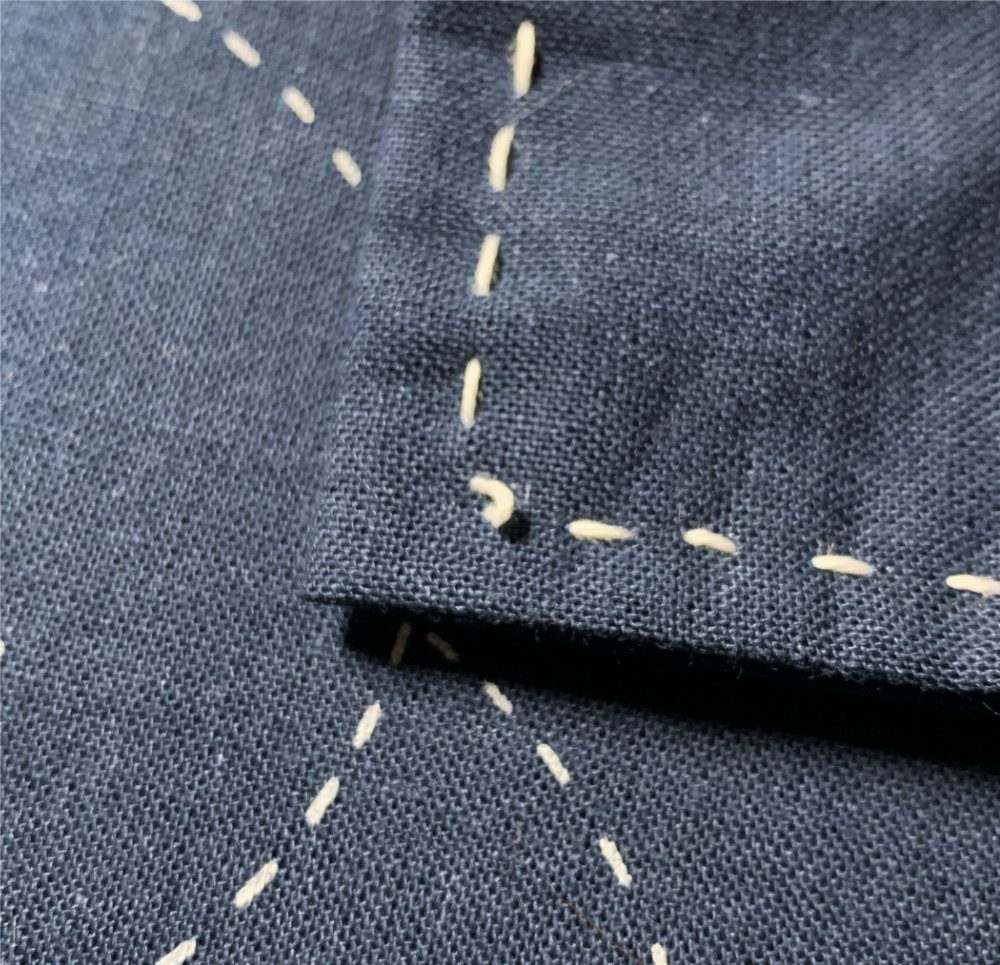
When turning corners it helps to leave a bit of ease in case there is too much tension in your stitching, or a thread is pulled tight or snagged while stitching. Note the small loop on the corner. These tiny loops usually ease into the rest of your stitches with washing and wear.
Once you’ve filled out all the marked stitches, it’s time to wash the cloth and remove the markings. All you need is a sink or basin of plain water. Agitate the cloth in the water to dissolve the ink, then smooth it out and hang it to dry. You can press it between layers of a tea towel, but it usually isn’t necessary.
Afraid to actually use it for drying your hands or dishes after you put so much time into making it look good? That’s ok! While these are practical, they can also just be pretty. Frame it, stitch it on to a tote bag or jacket, wrap a loaf of bread for the table, or add it to a quilt. These cloths make eco-friendly wraps for small gifts, and become part of the gift themselves.
The sampler in this tutorial can be completed in a weekend. If it takes you a year, so what? It can wait until you’re ready to finish. And if it doesn’t look as good as you’d like once you do finish it, then definitely use it in the kitchen! There’s no reason to toss it into a drawer and forget about it if you could use it instead.
